
티스토리 뷰
[Monitoring Tool] Elastic Stack: ElastAlert으로 Slack에 로그 알람 적용하기
miiingo 2019. 7. 25. 10:10Elastalert 설치
Prerequisites 설치
pip를 이용해 설치하기 때문에 pip 명령어가 없다면 따로 설치해주어야 합니다.
pip 설치를 위해서는 Python이 필요합니다.
# Python 2.7 설치
$ sudo apt-get install python-minimal
$ sudo python --version
Python 2.7.12

# 필요 패키지 설치
$ sudo apt-get install python-pip
Elastalert 설치 (pip 이용)
# Elastalert 설치
$ pip install elastalert
기본 설치 디렉토리는 /usr/local/lib/python2.7/dist-packages/elastalert 이며 elastalert 명령어를 사용하면 됩니다.
Elastalert 설치 (ElastAlert 저장소 이용)
# 소스 코드 복제
$ cd /opt/gopath/src/github.com/hyperledger/elastic-stack
$ git clone https://github.com/Yelp/elastalert.git

# 모듈 설치
$ pip install "setuptools>=11.3"
$ sudo python setup.py install

# Elasticsearch 5.0+
$ pip install "elasticsearch>=5.0.0,<7.0.0"
Slack 구성
Alert을 Slack으로 받기 위해 구성이 필요합니다.
Workspace & Channel 생성
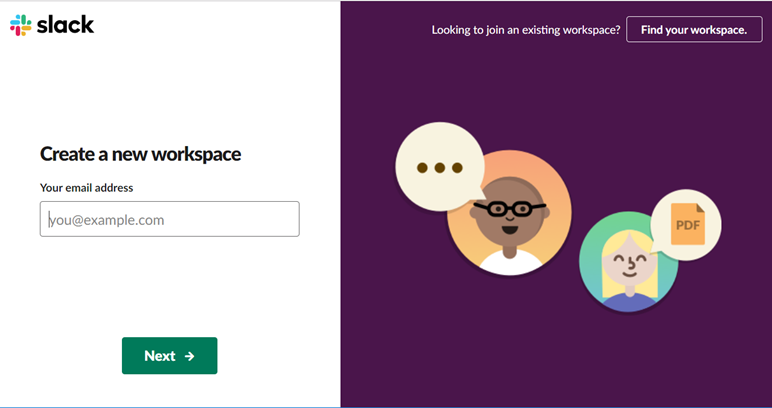
https://slack.com/intl/en-kr/ 페이지에 접속해 Workspace를 생성합니다.
만약 자신의 Workspace가 이미 존재한다면, 해당 Workspace를 사용해도 됩니다.
오른쪽 상단에서 "Your Workspaces > Create Workspace" 메뉴를 클릭합니다.

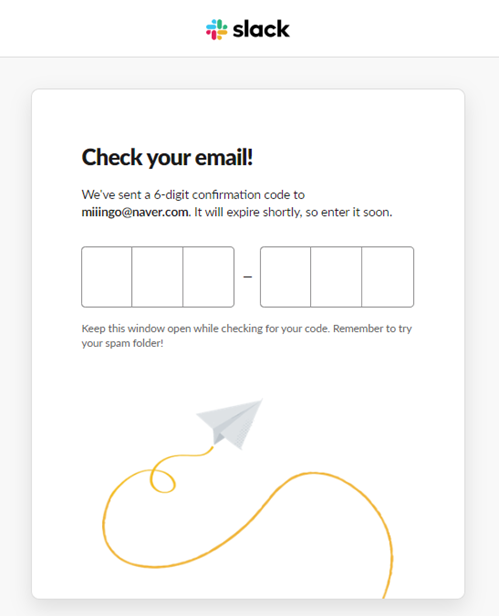
이메일 주소를 입력하고 "Next" 버튼을 클릭하면 인증을 위해 해당 이메일로 6자리의 확인 코드가 발송됩니다.
코드를 입력하면 다음 화면으로 자동으로 넘어갑니다.
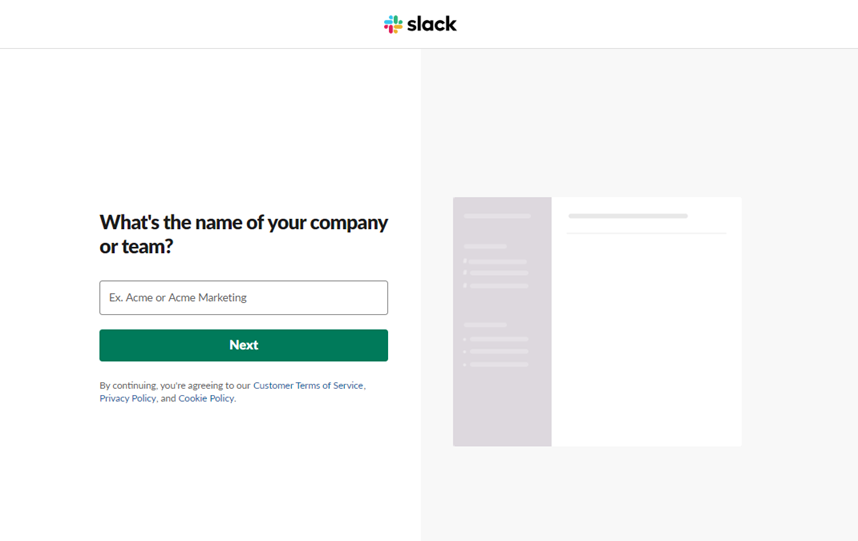
회사나 팀의 이름을 입력합니다. 여기에는 miiingo로 설정했습니다.
이 이름은 Workspace의 이름으로, 해당 Workspace의 왼쪽 상단에 표시됩니다.
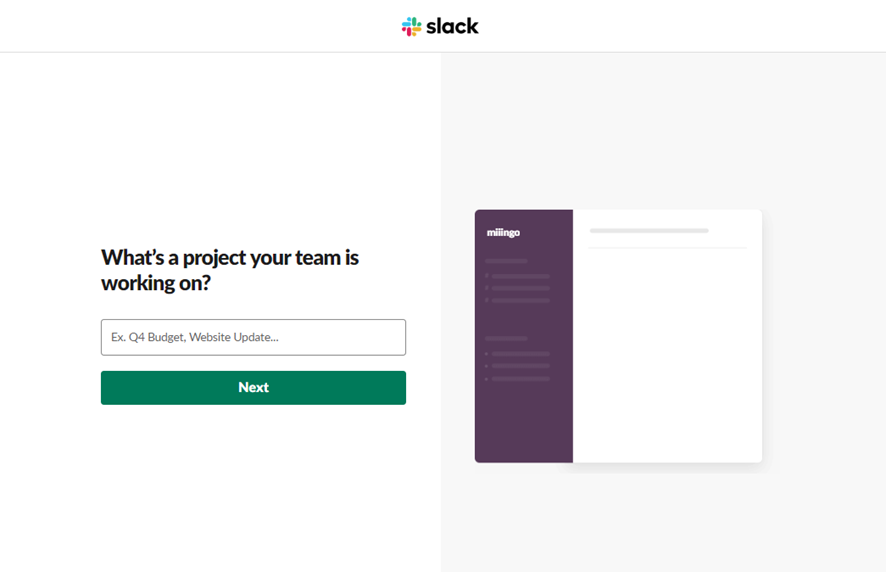
현재 일하고 있는 팀의 프로젝트명을 입력합니다. 여기에서는 monitoring으로 설정했습니다.
이 이름은 채널 이름이 됩니다.
Incoming WebHooks 설정
생성한 자신의 Workspace에 Incoming WebHooks을 설정합니다.
https://XXXXX(자신의 Slack 계정).slack.com/services/new/incoming-webhook에 접속해 채널을 선택합니다.
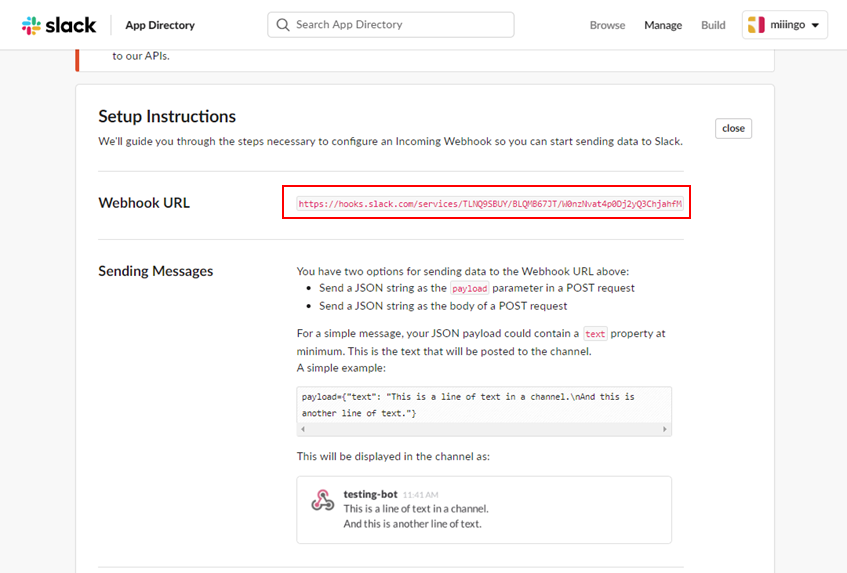
위에서 생성한 # monitoring 채널을 선택한 뒤, "Add Incoming WebHooks integration" 버튼을 클릭합니다.

추가가 완료되면, 다음과 같이 화면에 표시된 Webhook URL을 잘 저장해둡니다.
Elastalert 구성
설정 파일: config.yaml
# config.yaml 파일 설정
$ cd /opt/gopath/src/github.com/hyperledger/elastic-stack/elastalert
$ vim config.yaml
주요 항목:
- rules_folder : yaml 파일로 작성된 rule을 포함하는 폴더. 폴더 내의 모든 .yaml 파일이 rule로 로드
- run_every : ElastAlert이 Elasticsearch에서 쿼리를 수행할 주기 (weeks~seconds까지 가능)
- buffer_time : 일부 로그 소스가 실시간이 아닌 경우 결과를 버퍼링할 최근 기간
- es_host : Elasticsearch 호스트 이름
- es_port : Elasticsearch 포트 번호
- writeback_index : 메타 데이터 저장에 사용되는 Elasticsearch 호스트의 index
- alert_time_limit : 알림 전송에 실패할 경우 전송을 재시도할 최대 기간
# This is the folder that contains the rule yaml files
# Any .yaml file will be loaded as a rule
rules_folder: example_rules

# How often ElastAlert will query Elasticsearch
# The unit can be anything from weeks to seconds
run_every:
  minutes: 1

# ElastAlert will buffer results from the most recent
# period of time, in case some log sources are not in real time
buffer_time:
  minutes: 15

# The Elasticsearch hostname for metadata writeback
# Note that every rule can have its own Elasticsearch host
es_host: localhost

# The Elasticsearch port
es_port: 9200

# The AWS region to use. Set this when using AWS-managed elasticsearch
#aws_region: us-east-1

# The AWS profile to use. Use this if you are using an aws-cli profile.
# See http://docs.aws.amazon.com/cli/latest/userguide/cli-chap-getting-started.html
# for details
#profile: test

# Optional URL prefix for Elasticsearch
#es_url_prefix: elasticsearch

# Connect with TLS to Elasticsearch
#use_ssl: True

# Verify TLS certificates
#verify_certs: True

# GET request with body is the default option for Elasticsearch.
# If it fails for some reason, you can pass 'GET', 'POST' or 'source'.
# See http://elasticsearch-py.readthedocs.io/en/master/connection.html?highlight=send_get_body_as#transport
# for details
#es_send_get_body_as: GET

# Option basic-auth username and password for Elasticsearch
#es_username: someusername
#es_password: somepassword

# Use SSL authentication with client certificates client_cert must be
# a pem file containing both cert and key for client
#verify_certs: True
#ca_certs: /path/to/cacert.pem
#client_cert: /path/to/client_cert.pem
#client_key: /path/to/client_key.key

# The index on es_host which is used for metadata storage
# This can be a unmapped index, but it is recommended that you run
# elastalert-create-index to set a mapping
writeback_index: elastalert_status

# If an alert fails for some reason, ElastAlert will retry
# sending the alert until this time period has elapsed
alert_time_limit:
  days: 2

# Custom logging configuration
# If you want to setup your own logging configuration to log into
# files as well or to Logstash and/or modify log levels, use
# the configuration below and adjust to your needs.
# Note: if you run ElastAlert with --verbose/--debug, the log level of
# the "elastalert" logger is changed to INFO, if not already INFO/DEBUG.
#logging:
#  version: 1
#  incremental: false
#  disable_existing_loggers: false
#  formatters:
#    logline:
#      format: '%(asctime)s %(levelname)+8s %(name)+20s %(message)s'
#
#    handlers:
#      console:
#        class: logging.StreamHandler
#        formatter: logline
#        level: DEBUG
#        stream: ext://sys.stderr
#
#      file:
#        class : logging.FileHandler
#        formatter: logline
#        level: DEBUG
#        filename: elastalert.log
#
#    loggers:
#      elastalert:
#        level: WARN
#        handlers: []
#        propagate: true
#
#      elasticsearch:
#        level: WARN
#        handlers: []
#        propagate: true
#
#      elasticsearch.trace:
#        level: WARN
#        handlers: []
#        propagate: true
#
#      '':  # root logger
#        level: WARN
#          handlers:
#            - console
#            - file
#        propagate: false
설정 파일: error.yaml
이제 Alert을 보내기 위한 규칙을 생성합니다.
Docker 컨테이너의 로그들 중, warn이나 error가 포함된 로그에 대해 Alert을 Slack으로 전송하도록 설정합니다.
# error.yaml 파일 설정
$ cd /opt/gopath/src/github.com/hyperledger/elastic-stack/elastalert
$ vim error.yaml
주요 항목:
- name(필수) : 규칙 이름
- type(필수) : 알럿 타입
- index(필수) : 검색할 인덱스 (Elasticsearch에서 설정한 인덱스명과 동일해야합니다!!)
- filter(필수) : Elasticsearch에서 특정 이벤트를 찾을 필터 리스트
- alert(필수) : 규칙에 맞는 경우 알럿을 전송할 방법
- slack : Slack 구성
- slack_webhook_url : Slack에서 설정한 Webhook URL
- slack_username_override : Slack에 메시지를 올릴 유저명
- slack_channel_override : Slack에 메시지를 올릴 채널명
- slack_emoji_override : Slack에 메시지를 올릴 유저의 이모지
- slack_msg_color : 메시지 색깔
# Alert when the rate of events exceeds a threshold

# (Optional)
# Elasticsearch host
# es_host: elasticsearch.example.com

# (Optional)
# Elasticsearch port
# es_port: 14900

# (OptionaL) Connect with SSL to Elasticsearch
#use_ssl: True

# (Optional) basic-auth username and password for Elasticsearch
#es_username: someusername
#es_password: somepassword

# (Required)
# Rule name, must be unique
name: Error Log

# (Required)
# Type of alert.
# the frequency rule type alerts when num_events events occur with timeframe time
type: any

# (Required)
# Index to search, wildcard supported
index: docker_log_index*

# (Required, frequency specific)
# Alert when this many documents matching the query occur within a timeframe
# num_events: 1

# (Required, frequency specific)
# num_events must occur within this amount of time to trigger an alert
# timeframe:
#   hours: 1

# (Required)
# A list of Elasticsearch filters used for find events
# These filters are joined with AND and nested in a filtered query
# For more info: http://www.elasticsearch.org/guide/en/elasticsearch/reference/current/query-dsl.html
filter:
- query_string:
    query: "message:*warn* OR message:*error*"

# (Required)
# The alert is use when a match is found
alert:
# - "email"
- "slack"

# (required, email specific)
# a list of email addresses to send alerts to
# email:
# - "miiingo@naver.com"

slack:
slack_webhook_url: "https://hooks.slack.com/services/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"
slack_username_override: "ElastAlert-Bot"
slack_channel_override: "#monitoring"
slack_emoji_override: ":robot_face:"
slack_msg_color: "danger"
인덱스 생성
elastalert-create-index 명령어를 사용해서 인덱스를 생성합니다.
config.yaml 파일이 있는 위치에서 다음 명령을 실행해야 합니다.
※ Elasticsearch가 실행 중인 상태이어야 합니다!
# 인덱스 생성
$ sudo elastalert-create-index
# 인덱스 생성
$ sudo elastalert-create-indexElastAlert 실행 테스트
# ElastAlert 실행 테스트
$ elastalert-test-rule error.yaml
$ elastalert-test-rule --config config.yaml error.yaml
# ElastAlert 실행 테스트
$ elastalert-test-rule error.yaml
$ elastalert-test-rule --config config.yaml error.yaml
ElastAlert 실행
테스트가 정상적으로 수행되면, 이제 실제로 ElastAlert을 실행합니다.
# ElastAlert 실행
$ elastalert --verbose --start NOW --config config.yaml --rule error.yaml
# ElastAlert 실행
$ elastalert --verbose --start NOW --config config.yaml --rule error.yaml
Alert 발생
Alert이 발생하도록 다음 명령을 수행합니다.
# Alert 발생
$ docker container exec -it cli bash

# cli 컨테이너 내부에서 실행
$ export CHANNEL_NAME=mychannel
$ peer chaincode invoke -o orderer.example.com:7050 --tls true --cafile /opt/gopath/src/github.com/hyperledger/fabric/peer/crypto/ordererOrganizations/example.com/orderers/orderer.example.com/msp/tlscacerts/tlsca.example.com-cert.pem -C $CHANNEL_NAME -n mycc --peerAddresses peer0.org1.example.com:7051 --tlsRootCertFiles /opt/gopath/src/github.com/hyperledger/fabric/peer/crypto/peerOrganizations/org1.example.com/peers/peer0.org1.example.com/tls/ca.crt --peerAddresses peer0.org2.example.com:9051 --tlsRootCertFiles /opt/gopath/src/github.com/hyperledger/fabric/peer/crypto/peerOrganizations/org2.example.com/peers/peer0.org2.example.com/tls/ca.crt -c '{"Args":["invoke","a","c","10"]}'
이제 해당 오류가 Slack으로 오는 것을 확인할 수 있습니다.

오류 해결
pkg_resources.DistributionNotFound: The 'elasticsearch' distribution was not found and is required by elastalert
hyper@ubuntu:/opt/gopath/src/github.com/hyperledger/elastic-stack/elastalert$ elastalert --verbose --start NOW --config config.yaml --rule error.yaml
Traceback (most recent call last):
  File "/usr/local/bin/elastalert", line 6, in <module>
    from pkg_resources import load_entry_point
  File "/usr/local/lib/python2.7/dist-packages/pkg_resources/__init__.py", line 3241, in <module>
    @_call_aside
  File "/usr/local/lib/python2.7/dist-packages/pkg_resources/__init__.py", line 3225, in _call_aside
    f(*args, **kwargs)
  File "/usr/local/lib/python2.7/dist-packages/pkg_resources/__init__.py", line 3254, in _initialize_master_working_set
    working_set = WorkingSet._build_master()
  File "/usr/local/lib/python2.7/dist-packages/pkg_resources/__init__.py", line 583, in _build_master
    ws.require(__requires__)
  File "/usr/local/lib/python2.7/dist-packages/pkg_resources/__init__.py", line 900, in require
    needed = self.resolve(parse_requirements(requirements))
  File "/usr/local/lib/python2.7/dist-packages/pkg_resources/__init__.py", line 786, in resolve
    raise DistributionNotFound(req, requirers)
pkg_resources.DistributionNotFound: The 'elasticsearch' distribution was not found and is required by elastalert
해결 방법:
$ sudo pip install "elasticsearch>=5.0.0,<7.0.0"ImportError: cannot import name main
hyper@ubuntu:/opt/gopath/src/github.com/hyperledger/elastic-stack/elastalert$ sudo pip install "elasticsearch>=5.0.0"
[sudo] password for hyper:
Traceback (most recent call last):
  File "/usr/bin/pip", line 9, in <module>
    from pip import main
ImportError: cannot import name main
해결 방법:
위와 같은 에러가 발생할 경우, sudo 명령을 빼고 실행합니다.
$ pip install "elasticsearch>=5.0.0"참고 사이트
- Rule Types and Configuration Options - ElastAlert Docs (https://elastalert.readthedocs.io/en/latest/ruletypes.html)
- Yelp/elastalert - github (https://github.com/Yelp/elastalert)
- Elastalert + Slack 로그 알람 구축 - mp archive (https://mnpk.github.io/2017/03/17/elastalert-slack-integration.html)
- Elastalert로 로그 알람 구축하기 - Blog (https://andromedarabbit.net/elastalert%EB%A1%9C-%EB%A1%9C%EA%B7%B8-%EC%95%8C%EB%9E%8C-%EA%B5%AC%EC%B6%95%ED%95%98%EA%B8%B0/)
- ElastAlert: Alerting At Scale With Elasticsearch, Part 1 - yelp (https://engineeringblog.yelp.com/2015/10/elastalert-alerting-at-scale-with-elasticsearch.html)
- How to install ElastAlert with Elasticsearch on Ubuntu - FOSS LINUX (https://www.fosslinux.com/6240/how-to-install-elastalert-with-elasticsearch-on-ubuntu.htm)
- Elastalert을 사용해서 Telegram 메시지 보내기 - soulsearcher (https://soulsearcher.github.io/blog/2018/03/02/send_message_to_telegram_using_elastalert/)
'개발도구 > Monitoring Tool' 카테고리의 다른 글
- Total
- Today
- Yesterday
- 기초 of 기초 데이터 개념
- Hyperledger Indy
- javascript
- 하이퍼레저 인디
- DOCs
- Hyperledger Fabric v1.1
- 알고리즘
- 빅데이터
- 직딩잇템
- 블록 체인
- 블록체인
- 빅데이터 기초
- 암브로셔스
- 문제풀이
- Hyperledger Fabric v1.2
- ambrosus
- Hyperledger Fabric
- 빅데이터 강의
- 코테
- Blockchain
- ubuntu
- Private Data
- docker
- 빅데이터 교육
- 코딜리티
- 어서와 데이터는 처음이지
- 코딩테스트
- 하이퍼레저 페브릭
- codility
- 하이퍼레저 패브릭
| 일 | 월 | 화 | 수 | 목 | 금 | 토 |
|---|---|---|---|---|---|---|
| 1 | 2 | 3 | ||||
| 4 | 5 | 6 | 7 | 8 | 9 | 10 |
| 11 | 12 | 13 | 14 | 15 | 16 | 17 |
| 18 | 19 | 20 | 21 | 22 | 23 | 24 |
| 25 | 26 | 27 | 28 | 29 | 30 | 31 |